A Fair Trade Book


Title: Karen’s Doll (Baby-Sitters Little Sister #23)
Title: Karen’s Doll (Baby-Sitters Little Sister #23)
Date: 1991
Publisher: Scholastic
ISBN: 0-590-44832-3
Length: 95 pages
Illustrations: drawings by Susan Tang
Quote: “I carefully untied the ribbon. My new baby doll might want to wear it later.”
Two of Karen’s grandparents went to England, and what they brought Karen was a special, expensive, one-of-a-kind souvenir doll. One of Karen’s two best friends went to the hospital, and, since children under age twelve aren’t allowed to visit even child patients at the local hospital, Karen let her stepsister Kristy deliver the new doll to her friend. Kristy is a very responsible teenager, the founder of the Baby-Sitters Club...but she’s not perfect. The casual speech she makes when she presents the doll to Karen’s friend Nancy leads Nancy to believe that the doll is a present to keep. Karen’s parents blame Karen for “losing” the doll. Karen blames Nancy for wanting to keep the doll.
Of course, this is all taking place in the Lost World of Nice where the Baby-Sitters Club live, so you know there’ll be a happy ending. This book is recommended to all BSC collectors and to anyone who had not yet read the Baby-Sitters Club stories.
Here’s how I did the doll that goes with this book:
1. In the world of Barbie, the doll that most resembles Karen on the cover of the book was a Skipper doll (Barbie’s little sister). Although Skipper is shorter and thinner than Barbie, they’re close enough to the same size that the knitted version of that roomy sweatshirt and jeans Karen wears in the cover painting will fit either Skipper or Barbie...but I found a Skipper with thick blonde hair, an irregular part, side curls and a ponytail.
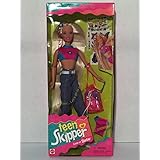

(I'm not sure that that's exactly the same version of Skipper I used, since the dolls I recycle to match children's books are always secondhand and seldom reach me with any clothes at all, but it's close.)
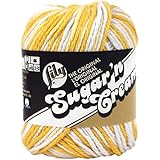
2. For the shirt, use less than an ounce of any yellow craft-type yarn. I used Sugar’n’Cream yellow and white ombre because I had some in the scrap bin. The last time I looked, some Wal-Mart stores still had this yarn on their shelves. Use the needles with which your gauge comes closest to 4 stitches per inch.

3. Cast on 10 stitches. Knit two rows (one garter stitch ridge).
4. Increase at each end of the next row, to 12 stitches, and purl back on these 12 stitches (2 rows stock stitch, or st st).
5. Work another 8 rows in st st.
6. Cast on 10 at each end of the next row. This makes ordinary long sleeves for Barbie, or too-long sleeves that need to be rolled back, as shown on the book cover, for Skipper. The first and last two stitches at each end of these rows form the cuff. You now have 32 stitches. On these 32 stitches, onright-side rows knit every stitch, and on wrong-side rows knit 2, purl 28, knit 2, for 4 rows.
7. Next row, knit 15, skip 2 with yarn in back, knit 15. Next row, knit 2, purl 12, skip 4 with yarn in front, purl 12, knit 2.
8. Next row, knit 13, bind off 6, knit 13. Next row, knit 2, purl 11, cast on 6, purl 11, knit 2.
9. Work the next 6 rows as in step 6.
10. Fold the piece up so that the cast-on edge of the sleeve is parallel with the row you are knitting. Work each of the 10 sleeve stitches by placing your right-hand needle through one of these cast-on stitches, then knitting the first stitch on the left-hand needle, then passing the loop from the cast-on edge over this stitch, repeating the process so that there are two stitches on the right-hand needle, and passing the stitch you knitted first over the stitch you knitted afterward, thus binding off the top and bottom of the sleeve together. Knit the remaining 22 stitches. Turn, and bind off the top and bottom of the other sleeve together. Purl the remaining 12 stitches.
11. Work 9 rows stock st on these 12 stitches, but when knitting the first and last stitch of each right-side row, work them together with the corresponding stitch from the front of the sweater. Decrease 1 at each end of the tenth row of stock st.
12. Work 1 garter stitch ridge on these 10 stitches, working the first and last st together with the first and last stitches in the g st ridge on the front of the sweater.
13. Loosely bind off, working the first and last st together with the first and last sts int he cast-on row.
14. For the collar, cast on 8 stitches. G st 2 rows (1 ridge). Inc each end of the third row, stock st 2 rows. Inc each end of the fifth row, g st 2 rows. Bind off loosely. Sew the first 2 cast-on stitches into 3 cast-off stitches on side front neck edge, the next 4 into 6 cast-on stitches on back neck edge, and the last 2 into 3 cast-off stitches on the other side front neck edge. Collar will stand up and roll slightly. Tack down each end of collar with a French knot.
15. For the jeans, I used Red Heart light blue acrylic yarn, again because I had some in the scrap bin. Most stores that sell craft yarn have Red Heart light blue acrylic, and it’s usually the cheapest of the tolerable craft yarns they have, but feel free to substitute any light blue yarn that knits up to 4 stitches per inch. Dolls’ knitwear doesn’t need to be washable or breathable, as humans’ does. If you find rayon yarn of an appropriate color and weight at your favorite charity store or bazaar, not that I’m recommending that manufacturers experiment with rayon yarn, but dolls can wear it.


16. Cast on 10 stitches. Knit two rows.
17. Increase in each of these 10 stitches, then purl back across 20 stitches.
18. Work 10 rows stock st on 20 stitches.
19. Knit 10 stitches, turn, purl back, and work another 18 rows stock st. Measure as you go. The way I knit, 20 rows is always the standard length for Barbie’s or Ken’s jeans and long enough for turned-up cuffs on Skipper’s after step 20 is complete. Your row gauge may vary.
20. Work 2 more g st ridges. Bind off.
21. Work the remaining 10 stitches to match the first 10 stitches.
22. Sew up inseams and front fly, and knot the ends of your sewing yarn together with the cast-on end at the waistband.
23. Some finishing touches for perfectionists: (1) Use either yarn or scraps of woven material, in white (as shown) or any color that resembles a human skin tone, to make a baby doll about 2” long. If you choose white, you can use scraps from an old handkerchief, bed sheet, or T-shirt, and add pink or tan highlights with paint or Magic Marker to create a difference between the doll’s skin and its white smock. Use pure white yarn or scrap fabric to make a sleeveless smock, gathering it to fit under the arms.Make French knots in blue or brown for the eyes. Satin stitch or work simple fringe for short black hair.
(2) Wrap a bright pink
rubber band or scrap of yarn around Karen’s ponytail.
(3) If you’re making the
doll for an adult’s or older child’s collection, shape fine wire to resemble
Karen’s glasses. If you’re making it for a young child, let the child decide
whether or not you draw on glasses. Since the doll I used has slightly
oversized eyes, to me she looks as if she’s wearing big round corrective
glasses already.
No comments:
Post a Comment