(Reposted from Blogjob)
Seeing this Pixabay image on Blogjob (https://blogjob.com/ideasforindoorliving/old-fashioned-christmas-activities-kids/) reminded me that one of the first few things I knitted was a pair of mittens very similar to the ones the little girl is wearing. I was fascinated by space-dyed yarn too. I used a brushed acrylic yarn, which feels very cozy until it gets wet.
Acrylic yarn is often the cheapest and easiest kind to find in the U.S., and it makes gorgeous recycled fashion doll outfits, but there are good reasons to look for pure cotton or pure wool when you want to knit mittens. Cotton mitts are good for picking up hot or slippery dishes in the kitchen; when they wear out, they make good dishwashing rags. Wool mittens feel prickly when your hands are warm, which makes them self-warming when your hands are cold and wet. Acrylic mittens will turn snow if they're thick enough, and these are thick...but once the snow melts and soaks into the mittens, you'll have cold, wet, soggy mittens that stretch and droop off your hands.
To make a pair of thick, easy mittens, you want about three ounces of any of these yarns, but I seriously recommend buying four ounces, even five if using cotton:
Wool: Fisherman's Wool
(They'll cost less if you buy them from a local store than if you have them shipped online.)
Experiment with different needle sizes, because following these instructions with different needles will give you different sizes of mittens. I usually use #8 needles for most projects that use the yarns mentioned above, but since my hands are somewhere in between the standard "small woman's" and "large child's" sizes, if I want to knit these mittens for myself I'll use #6 needles. Plain straight needles, the 10" length, are fine for this pattern.
(If you already have a set of four or five double-pointed needles for knitting more traditional seamless mittens, feel free to join the stitches into a round and knit this type of mittens seamlessly.)
- To find out how many stitches to cast on, measure around the hand of the person who will be wearing the mittens. Make a test swatch of 30 stitches and measure how many stitches per inch you get with the needles you use. The most useful mittens are knitted a little more firmly than a sweater would be--you want them to be snowproof rather than drapey--so you want 4.5 to 5.5 stitches per inch; if you get fewer, try again with smaller needles. Multiply the number of stitches you get by the number of inches around the person's hand to get the right number of stitches for these mittens. This will probably be about 40 stitches for an adult, 30 for a child--but do the math first.
- Since our model is a child, let's say the Right Number of Stitches is 32. Cast on 2 stitches fewer than the Right Number, which would be 30. Work K2P2 rib for 1 to 3 inches, or as long as the person wants the cuff of the mitten to be.
- Shape the palm by increasing 2 stitches and changing to stock stitch (knit the right-side rows plain, purl the wrong-side rows). Work 4 rows straight stock stitch.
- Shape the thumb. This is the most complicated part of making a mitten. Starting (for the sake of simple pattern writing) on a knit row, knit 1 stitch less than half the total number--for a 32-stitch mitten, knit 15 stitches. Increase (M1) by lifting up the thread between the last stitch knitted and the next one on the needle, and knitting it through the back loop. Knit 2 stitches. M1 again. Knit to the end, and purl back.
- For as many rows as it takes to cover the part of the hand that is joined to the thumb, knit the same number of stitches you did on the first row of this Thumb Gusset Section, M1, knit 2 more than you did between the M1's on the previous row, M 1, knit to the end, and purl back. For a typical 32-stitch mitten, this will be 10 rows, and the last row of thumb shaping will be "K 15, M 1, K 10, M 1, K 15."
- On the next purl row, separate the thumb from the hand: P 27, wrap and turn, K 12, wrap and turn, then stock st on these center stitches only until the thumb is about 2 rows shorter than the person's actual thumb. (For a child, you can knit the thumb and hand a little too long in case the child's hand grows.)
- On the next knit row, decrease 4 by *K 1, K2tog, K 1* across the row. If this leaves 8 stitches, purl back. If you've made a bigger mitten and this first decrease row leaves more than 8 stitches, decrease by *P 1, P2tog* across the row, and if necessary by *K2tog* until 8 stitches remain.
- When you have 8 stitches, purl back if necessary, then *K2tog* and break the yarn leaving about a 12" end. Put this end through a yarn needle and draw it through the last 4 stitches. You can sew the thumb together now, or later.
- Return to the hand. Pick up 2 stitches from the base of the thumb (if you don't know how this is done, ask someone to show you). Stock stitch on 32 stitches until the mitten is long enough to reach from the person's wrist to the person's little finger.
- K 1 stitch. K2tog. K to 3 stitches before the halfway point--10 stitches, if you're making a 32-stitch mitten. K2tog. K 2. K2tog. K to the last 3 stitches. K2tog. K 1. Purl back.
- Repeat the first decrease row by K 1, K2tog, K 8, K2tog, K 2, K2tog, K 8, K2tog, K 1, or similar shaping for the size you're making. Purl back. Continue to decrease until the mitten is as long as the person's hand from wrist to middle finger.
- Divide the remaining stitches in the middle and bind them off together. Sew the open edge together.
- Commercial mittens come in pairs, so if you bought only 3 ounces of yarn, you can knit one more mitten and call it a day. However, if you have 4 or 5 ounces of yarn, you may knit two more mittens, because people tend to lose one mitten during the winter.
- Remember (or remind the person) to enclose the pair of mittens in a pillowcase before putting them in the washing machine, to avoid having to pick one mitten out of the washing machine. (Washing machines really do "eat" mittens; more about that at https://priscillaking.blogspot.com/2011/11/green-tips-for-maintaining-household.html .)
- Optional: For a child who's small enough, or an adult who's confident and practical enough, to appreciate "stringalong" mittens, you may crochet a string, tie it through one of the loose cast-on stitches at the wrist of each mitten, and thread it through a coat.
Here's what I meant about the doll outfit: https://blogjob.com/priscillaking/2015/11/04/how-to-knit-mandies-dress/
This is a basic mitten pattern. Similar but not identical mitten patterns, plus patterns for fancier mittens and/or matching caps and scarves, are found in pattern books like these:
Urban Knitter  by Lily Chin
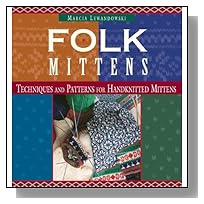
Folk Mittens by Marcia Lewandowski


No comments:
Post a Comment